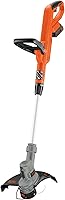
How to Replace a Weed Eater Head
To replace a weed eater head, disconnect the power, lock the shaft, unscrew the old head, and thread on the new one in the reverse direction. Then load the line to the head's spec and spin it in open air before trimming.
On this page (8 sections)
- What you need before you replace a weed eater head
- How to remove the old trimmer head safely
- How to install the new weed eater head
- How to load line into the new head
- How to test the new head before you trim
- Which trimmer heads and machines suit a head swap?
- Common mistakes when replacing a trimmer head
- When should you replace the head instead of reloading line?
To replace a weed eater head, disconnect the power, lock the shaft, unscrew the old head, and thread on the new one in the direction opposite the cutting rotation. Load the line to the head's spec, then spin it in open air before you trim.
The whole job takes about ten minutes on most straight-shaft trimmers.
A worn head causes the two problems that send people searching for how to replace weed eater head parts: line that won't feed and a spool that keeps throwing loops. A fresh head fixes both when the housing or feed mechanism is the real culprit.
If only the line is worn out, reloading is enough. This guide walks through the safe order of work and the checks that stop a new head from wobbling or spinning loose.
What you need before you replace a weed eater head
Gather the new head, the tool that came with the trimmer, and fresh line before you start. Most heads include a small pin or hex key for locking the shaft.
A clean rag and work gloves help with the grit that collects around the gearbox.
Check the fit first. Your replacement head has to match the trimmer's shaft thread and drive type.
Straight-shaft and curved-shaft models often take different heads, and the thread pitch varies between brands and even between models from the same brand. The head's instructions name the trimmers it fits, so read them against your model number before you take anything apart.
Line size matters too. A head built for 0.095-inch line won't feed 0.080-inch line cleanly, and thin line in a wide eyelet wears fast.
Check the head's spec for the line diameter it accepts. If you also want to sort out your storage between jobs, see how to store a weed eater in the garage so the trimmer stays ready for the next cut.
How to remove the old trimmer head safely
Disconnect the trimmer from its power source first. Unplug a corded model, pull the battery on a cordless one, and let a gas trimmer cool before you touch the head.
A trimmer that starts by accident during the swap is the main safety risk in this job.
Lock the shaft so the head can't spin while you turn it. Most trimmers have a hole near the gearbox for a locking pin, or a slot you press a screwdriver into.
On models without a lock, hold the shaft with a gloved hand or wedge it as the manual shows.
Then turn the head in the direction that loosens it. Most heads unscrew clockwise as you face the bottom, because the cutting rotation is counterclockwise.
A few models reverse this, so turn gently at first and let the thread tell you which way it wants to go. Once it's free, slide the head off and set it aside.
Wipe the shaft end clean so grit doesn't get trapped under the new head.
How to install the new weed eater head
Thread the new head on by hand, turning it against the removal direction, until it seats flat. Keep any spacer or washer that came off with the old head in place; the new head should sit square on the shaft with no gap.
Line up the thread straight before you turn. Starting a thread at an angle is the usual cause of a cross-thread that later wobbles or binds.
Spin the head on until it stops against the shaft face, then snug it by hand. Don't crank it with a tool unless the instructions call for it.
On most models the head tightens itself as the trimmer spins, so a light hand fit is right.
Release the shaft lock and turn the head slowly by hand. It should turn freely with the shaft and sit flat.
If it wobbles, take it off and check that the mounting face is clean and the spacer is in place. Our guide on how to choose a weed eater covers matching heads and attachments when you're shopping for a new trimmer rather than a part.
How to load line into the new head
Follow the head's own loading pattern, because heads differ in how line goes on. Some take two equal lengths wound in opposite directions around a spool, and others are bump-feed heads you wind and thread through the eyelets.
The instructions that came with the head show the exact path.
Use the line diameter the head is built for. Cut the lengths the manual states, keep the ends even, and wind them snug so they don't cross or overlap.
Crossed line binds on the first feed and causes the bump mechanism to jam. Thread the ends through the eyelets and leave the short tails the instructions suggest.
The EGO Power+ Twisted String Trimmer Lines are pre-cut 0.095-inch line in a five-pack, so each length is already sized for EGO heads.
EGO's line measures 14 feet per pack, and the twisted construction is built for the toughest jobs. It fits string trimmer heads designed to handle 0.095-inch line, so check your head's size before you load it.
For a longer spool of thinner line, the Dewalt Trimmer LINE comes as 225 feet of 0.080-inch line in a single roll.
That roll suits trimmers that call for 0.080-inch line. A 0.095-inch head won't feed it cleanly, so match the diameter to the head rather than buying the longest roll.
How much line should go on the spool?
Fill the spool to the line the head's instructions mark, not past it. Overfilling packs the line too tightly and makes the feed bind; underfilling means you stop to reload sooner.
Leave the short gap the manual shows between the wound line and the spool rim.
If the trimmer's line keeps breaking, look at the diameter and the feed eyelets before blaming the head.
How to test the new head before you trim
Start the trimmer away from people and windows and let it run at full speed for a few seconds. A correctly fitted head spins smoothly with no wobble and no rattle.
If the head shakes, stop at once and recheck the seating.
Hold the trimmer so the head is clear of the ground and any obstacles. Tap the bump feed once or twice to check that line advances.
The line should feed evenly and trim at the cutting width your head is rated for. A head that won't advance usually has line wound too tight or crossed on the spool.
Check the head after the first minute of real trimming. Re-tighten if it has worked loose, and clear any grass wrapped around the shaft.
A small wrap of grass under the head is normal; a heavy wrap means you're cutting too low or too slow. For a cordless trimmer to pair with a fresh head, compare models in our guide to the best cordless weed eaters.
Which trimmer heads and machines suit a head swap?
Match the head to the machine first, then choose the line. A straight-shaft trimmer with a threaded gearbox is the easiest to work on, because the head unscrews in one motion once the shaft is locked.
Curved-shaft models often use a different mount and sometimes a different feed style.
The Husqvarna 122LK is a straight-shaft gas trimmer with a 22-cc 2-cycle engine and a T25 head. Husqvarna calls the T25 a heavy-duty head, and the trimmer accepts a range of attachments that click on for quick changes between tools.
That makes it a practical base if you swap heads or attachments often. Its SmartStart recoil system is designed to make starts quick and low-effort.
The straight shaft helps it reach under bushes and other obstacles. If you run a trimmer like this for years, how long does a weed eater last explains the signs that a head or engine is near the end of its useful life.
Common mistakes when replacing a trimmer head
The three mistakes that cause most problems are turning the head the wrong way, cross-threading it, and overfilling the spool. Turn gently at first so the thread tells you the direction, start the new thread straight by hand, and stop winding at the marked line.
Other easy misses: leaving out the spacer so the head sits crooked, forgetting to lock the shaft and rounding the thread, and running the trimmer with a loose head. Always disconnect the power before the swap.
A head that keeps loosening after a correct fit points to worn threads on the shaft, not a bad head. Stop using the trimmer if the shaft thread is stripped and have it checked.
When should you replace the head instead of reloading line?
Replace the head when the spool won't hold line, the feed won't advance, the housing is cracked, or the thread is stripped. A head that still holds line and feeds evenly only needs a reload.
The head is the part that wears out; the line is the part you replace often.
Replacing a weed eater head is a short job when you disconnect the power, lock the shaft, and fit the new head flat before loading line. Pick a head that matches your trimmer's thread and line size, test it in open air, then check the fit after the first minute of cutting.
If your trimmer's shaft is sound and only the head is worn, the swap restores clean feeding without buying a new machine. If the trimmer itself is tired, see our guide to how long a weed eater lasts before you spend on parts.
Frequently asked questions
Do I need tools to change a trimmer head?
Most heads need only a screwdriver or the small pin that came in the box. A few use a hex wrench on a locking screw.
Check your head's instructions for the exact tool before you start.
Can I put any trimmer head on my weed eater?
No. The head must match your trimmer's shaft thread and drive system.
Straight-shaft and curved-shaft models often take different heads, and gearbox threads vary, so match the head to your model's stated fit.
How tight should the new head be?
Hand tight is enough on most models. A head threaded onto a shaft that spins against the cutting direction tightens itself in use, so over-tightening can make the next change harder.
Why does my new head wobble after I install it?
A wobble usually means the head isn't seated flat on the shaft, a spacer or washer is missing, or the thread started cross-threaded. Stop the trimmer, remove the head, and check that the mounting face is clean and square.
When should I replace the head instead of just the line?
Replace the head when the spool won't hold line, the bump feed stops advancing, the housing is cracked, or the threads are stripped. A head that still feeds and holds line evenly only needs fresh line.