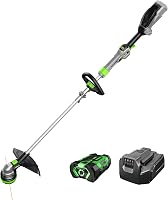
How to Assemble a Greenworks String Trimmer
To assemble a Greenworks string trimmer, slide the lower shaft into the upper shaft, tighten the collar, fit the auxiliary handle and guard, then seat the spool and battery. Check the line, guard screws and battery latch before the first cut.
On this page (10 sections)
- What parts come in the box?
- How do you connect the upper and lower shafts?
- How do you fit the auxiliary handle?
- How do you attach the guard?
- How do you set up the cutting head and line?
- How do you fit the battery and start the trimmer?
- Which Greenworks trimmer suits the way you'll use it?
- What should you check before the first cut?
- How do you keep the trimmer ready after assembly?
- When should you stop and get help?
To assemble a Greenworks string trimmer, slide the lower shaft into the upper shaft, tighten the collar, fit the auxiliary handle and guard, then seat the spool and battery. Check the line, guard screws and battery latch before the first cut.
The job takes about 15 to 20 minutes and needs only the tool that came in the box. The steps below cover the order that keeps every part lined up, so you're not fighting the shaft after the guard is on.
What parts come in the box?
A Greenworks trimmer kit includes the shaft, an auxiliary handle, a guard, a spool, a battery and a charger. The smaller pieces come in a bag, so empty the carton fully before you begin.
The 60V 16-inch model arrives as a kit with a 4.0 Ah battery, charger, spool and an adjustable shoulder strap. The 80V 16-inch model includes a 2.0 Ah battery, a charger, the guard and an auxiliary handle.
The 40V attachment-capable model also ships with its battery and charger.
Lay the parts on a clean, flat surface. Sort the screws and knobs by size so the guard hardware doesn't get mixed with the handle clamp.
Keep the manual handy for the parts diagram on your exact model.
Check the cutting head before assembly. A spool already fitted at the factory may need its cap pressed down or its line pulled free before the trimmer will run smoothly.
How do you connect the upper and lower shafts?
Push the lower shaft into the upper shaft until it seats, then tighten the collar by hand. The joint is the backbone of the trimmer, so it needs to be fully engaged, not just snug.
Line up any alignment tab or groove with its slot before sliding. The tube should go in with light pressure; if it stops short, rotate it slightly rather than forcing it.
Hold the upper shaft and twist the lower one to test the joint. Movement means the tube isn't seated all the way.
Loosen the collar, push again, and re-tighten until the shaft is solid.
Check the overall length against your height once the joint is tight. The 60V model measures 68.5 inches long and the 80V model 65 inches, so set the handle and stance before you tighten everything down.
How do you fit the auxiliary handle?
Slide the handle clamp onto the upper shaft and tighten it at hip height. The auxiliary handle gives you a second grip point and takes strain off your forward arm during long sessions.
Loosen the clamp bolt or knob, slide the bracket over the shaft and position it below the main grip. Most Greenworks models put the handle roughly a forearm's length down from the top.
Set the angle so your wrist sits straight when you hold both grips. Tighten the hardware until the bracket won't rotate under hand pressure.
Recheck it after the first few minutes of use, since new clamps can settle.
If your model has a shoulder strap, clip it to the loop on the shaft. The 60V 16-inch trimmer includes an adjustable shoulder strap that spreads the tool's weight across your body.
How do you attach the guard?
Slide the guard over the cutting head and fix it with the supplied screws. The guard shields you from thrown debris, so it goes on before the trimmer ever starts.
Match the guard's mounting holes to the brackets on the head, then start each screw by hand. Tighten them evenly in a cross pattern so the plastic sits flat.
Don't overtighten into soft plastic; snug is enough.
Some guards have a sharp edge for cutting fresh line to length. That edge faces the spool, so the line gets trimmed as it feeds out.
Fit the guard the wrong way and the line stays long and floppy.
Check the clearance between the guard and the spool cap. The cap should turn freely with no rubbing, and the guard should not touch the line.
How do you set up the cutting head and line?
Fit the spool so the line exits toward the cutting side, then press the cap until it clicks. A correctly seated spool is what keeps the trimmer from throwing line or jamming.
On the Load N' Go head fitted to the 60V 16-inch model, feed the line through the eyelets before pushing the cap down. Pull a few inches of line out on each side so it has room to feed on the first start.
The 80V model uses a bump feed head with 0.080-inch dual line. The 40V attachment-capable model runs 0.095-inch dual line.
Match any replacement line to the size your head calls for.
If the cap won't click, lift it and check that the spool sits flat and the spring is in its seat. For the full line-loading sequence on your model, see how to load a Greenworks string trimmer.
How do you fit the battery and start the trimmer?
Slide the battery into the shoe until the latch clicks, then squeeze the trigger with the trimmer clear of the ground. A half-seated pack can vibrate loose mid-cut.
Push the pack straight in along its rails rather than at an angle. The latch should spring back and hold the battery flush with the housing.
If it doesn't click, pull it out and check for dirt on the contacts.
Stand the trimmer on flat ground and squeeze the trigger for a few seconds. Listen for a steady motor and watch the head spin without wobble.
Release the trigger and confirm the head stops.
The 60V model uses a 60V 4.0 Ah pack, the 80V model an 80V 2.0 Ah pack, and the 40V model a 40V 4.0 Ah pack. Keep batteries on their own platform; a pack from a different voltage won't fit the shoe.
Which Greenworks trimmer suits the way you'll use it?
Pick the 60V 16-inch model for the best balance of power, runtime and attachment options. It's the strongest all-round choice in this lineup for medium to large yards.
The 60V platform shares its battery with more than 75 other Greenworks 60V tools, so one pack can run a blower or hedge trimmer later. The attachment-capable shaft lets you add compatible attachments instead of buying a second tool.
Which trimmer is best for a large yard?
The 80V 16-inch model delivers strong cutting power for tough grass and weeds. Its variable-speed trigger lets you slow down around plants and speed up on open fence lines.
It includes a 2.0 Ah battery that Greenworks says charges in about 30 minutes. The lighter 16-pound build helps on long sessions, though the smaller pack means shorter runtime than the 60V kit.
Which trimmer is best on a tighter budget?
The 40V 16-inch attachment-capable model covers trimming and edging around beds, fences and driveways. It weighs 15.2 pounds, which Greenworks calls 25 percent lighter than comparable gas models.
It accepts the PAC458 edger, PAC459 hedge trimmer, PAC460 polesaw, PAC461 cultivator and PAC462 blower. That makes it the pick if you want one battery to run several attachments without stepping up to a higher voltage.
What should you check before the first cut?
Run through the joint, guard, handle and battery once more, then clear the area before starting. These checks catch the small mistakes that cause vibration or thrown line.
- Twist the shaft to confirm the collar is tight.
- Push and pull the auxiliary handle to test its clamp.
- Check every guard screw with your fingers.
- Confirm the spool cap is seated and the line feeds freely.
- Make sure the battery is latched and the charger is unplugged from the tool.
Wear eye protection and closed shoes. Remove stones, toys and loose debris from the area, since a string trimmer throws cut grass and small objects at speed.
Start on a patch of light grass to get a feel for the trigger and the cutting height. Hold the head level rather than tilting it into the soil, which wears the line fast and scuffs the guard.
How do you keep the trimmer ready after assembly?
Wipe the head and guard after each session, check the line and store the trimmer dry. A few minutes of care keeps the joints tight and the head feeding cleanly.
Clear cut grass from the spool housing before it dries and hardens. Our guide to how to clean a string trimmer walks through the head, shaft and air intakes without dunking the tool.
Check the shaft collar and handle clamp now and then. Vibration loosens hand-tightened hardware over time, so a quick re-snug keeps the trimmer solid.
Store the battery off the tool in a dry spot, and put the trimmer where the shaft won't get stepped on. If you're comparing platforms before you buy, our EGO vs Greenworks string trimmer breakdown covers the differences in batteries and build.
For buyers weighing lighter options, the best 20V string trimmers roundup covers models for small yards and quick touch-ups. The assembly steps here still apply: shaft, handle, guard, spool and battery, in that order.
When should you stop and get help?
Stop if a part won't seat, the guard won't sit flat or the motor won't start after the battery clicks in. Forcing plastic parts usually cracks them, and a loose guard is a safety problem.
Check the manual's parts list for anything missing from the box, then contact Greenworks support with your model number. Most assembly snags come down to an alignment tab not in its slot or a spool cap not fully pressed down.
Once the trimmer is together and running smoothly, the hard part is done. Following the assembly order each time you swap attachments keeps the how-to-assemble-a-Greenworks-string-trimmer routine quick and repeatable.
Frequently asked questions
Do Greenworks string trimmers come fully assembled?
No. Most models arrive with the shafts separate or partly fitted, and you add the auxiliary handle, guard, spool and battery.
The exact parts in the box vary by model, so unpack everything and lay the pieces out before you start.
How tight should the shaft collar be?
Tighten the collar until the lower shaft cannot twist or slide by hand. Snug is enough; don't use a tool to over-tighten a hand knob.
If the shaft still moves after tightening, loosen it, reseat the tube fully and tighten again.
Which way does the spool go on a Greenworks trimmer?
Fit the spool so the line exits on the cutting side of the head and the cap seats flush. On Load N' Go heads the line feeds through the eyelets, so keep the spool flat and push the cap down until it clicks.
Can I use a different battery in a Greenworks trimmer?
Use a battery from the same Greenworks voltage platform as the trimmer. A 60V trimmer takes 60V batteries, an 80V trimmer takes 80V packs, and a 40V trimmer takes 40V packs.
Mixing voltages won't fit the shoe or power the tool.
What should I check before the first start?
Check that the guard screws are tight, the handle is secure, the spool cap is seated and the battery has clicked into place. Squeeze the trigger with the trimmer clear of the ground and listen for a steady motor before you take it to the grass.